
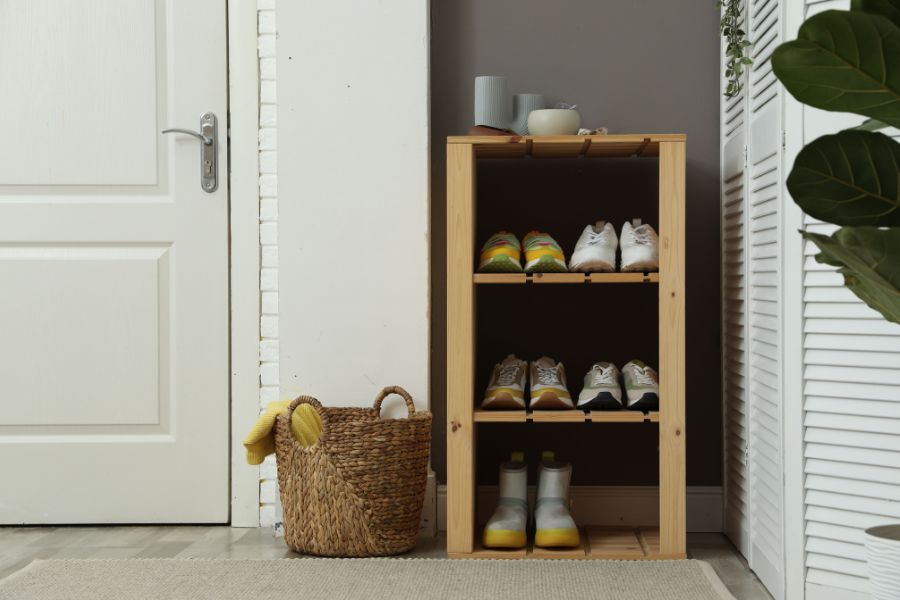
Have you ever tripped over scattered sneakers in the dark? It is a terrible way to end a long day. Your hallway should always welcome you home very peacefully. Instead it often looks like a messy shoe explosion. You can fix this chaotic daily problem very easily. The secret lies in a highly rewarding weekend project. You just need a sturdy Custom Wooden Shoe Rack. This single piece of furniture changes your daily routine. It finally corrals the mess and restores your sanity. Let us explore exactly how to build a custom wooden shoe rack for your entryway today. This project is fun and incredibly rewarding for beginners. You will soon enjoy a perfectly organized home entrance.
Planning Your Custom Wooden Shoe Rack Layout
Every great build always starts with a solid plan. You cannot rush into this blindly without proper measurements. Grab a tape measure and a blank notepad first. Let us figure out your unique space requirements now. If you want to add elegant details to shelves, learning about choosing the right router bit for edge profiling is very helpful. Routing edges prevents sharp corners from damaging your footwear. A smooth edge makes your DIY project look expensive. Proper planning saves you money at the hardware store.
Measuring Your Available Hallway Space
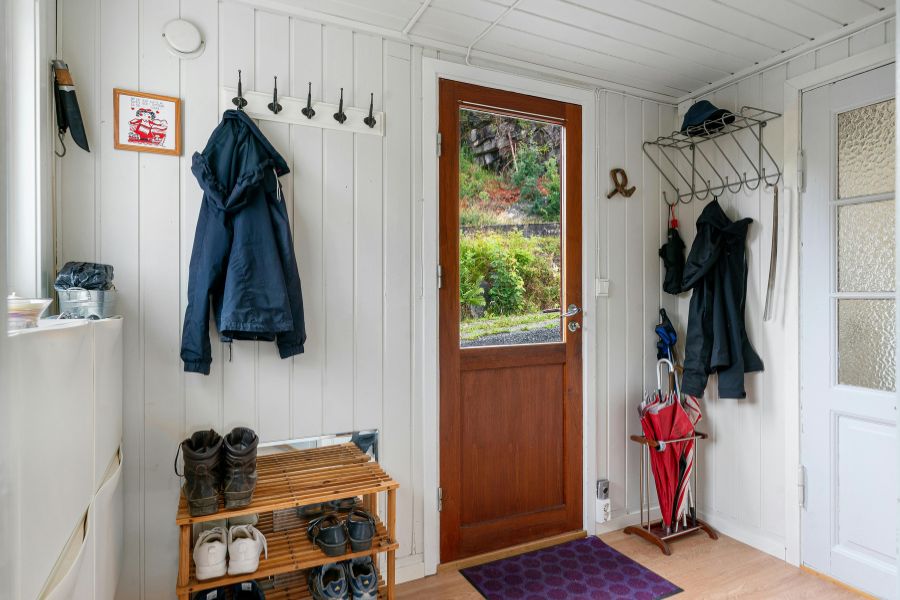
Look closely at the floor space near your door. You must measure the maximum width available for storage. Do not forget to account for the front door swing. A bulky storage unit might block your main exit. We want absolute space efficiency in this tight area. Consider the height of your tallest winter boots too. Boots need much more vertical clearance than summer sandals. Count how many pairs of shoes you own currently. You will build this Custom Wooden Shoe Rack for them. Add a little extra room for future footwear purchases. A good design solves both current and future problems.
Take your time mapping out the exact shelf heights. A cramped shelf will just frustrate you every morning. Measure your largest pair of running shoes for depth. This ensures nothing hangs awkwardly over the wooden edge. Precision during this stage guarantees a perfect final fit. You can sketch your ideas on a piece of paper. Visualizing the final product helps avoid silly construction mistakes. Ask your family members for their input and ideas. Their daily habits should influence your final furniture design.
Choosing the Right Lumber for the Job
Wood selection dictates the entire look of your build. You need materials that are affordable and easy to work. We must explore the best softwood choices for small hallway projects. You will find that standard pine boards are perfect. Pine is cheap and widely available in local stores. It is also lightweight and easy to carry home. It takes colored stains incredibly well after proper sanding. Check every single board for nasty warps or cracks. Sighting down the wood edge prevents buying ruined lumber. Selecting straight wood boards makes assembly much easier later. Crooked wood leads to frustrating gaps and uneven shelves.
If you use plywood for the side panels, be careful. You must apply iron on edge banding to hide raw edges. This makes cheap plywood look like premium solid wood. Your Custom Wooden Shoe Rack will look truly professional. You can buy this banding at any hardware store. It applies easily with a standard hot household iron. Trim the excess banding with a sharp utility knife. This small detail elevates your project to the next level. Solid wood is always preferred but plywood saves money.
Gathering Your Essential Woodworking Supplies
Do not start building without all your tools ready. A mid project run to the store ruins momentum. Organize your workspace clearly before making the first cut. While modern tools speed up the entire building process, exploring why hand-cut joinery is making a strong comeback is highly fascinating. Traditional methods offer unmatched strength and a beautiful aesthetic. However we will stick to simple fasteners for speed. Gathering the right materials today guarantees success tomorrow morning.
The Must-Have Hardware and Tools
You need specific fasteners to make this unit strong. A box of high quality pocket screws is absolutely vital. They hide deep inside the wood for a clean look. You also need premium interior wood glue for strength. Screws hold the wood while the glue dries completely. Grab some medium and fine grit sandpaper sheets too. You will need a reliable power drill and a saw. A miter saw makes perfectly straight cuts very quickly. However a basic circular saw works fine with practice. This is an easy DIY slatted shoe storage bench tutorial. You do not need a massive professional workshop setup. Hand tools can accomplish this job just as well.
Make sure your drill battery is fully charged beforehand. Having extra drill bits prevents delays if one breaks. A carpenter square is crucial for perfectly aligned corners. Tape measures and sharp pencils are your best friends. Keep your workspace tidy to avoid losing small parts. Safety glasses and dust masks are mandatory for protection. Buy quality paint brushes for applying the final finish. Cheap brushes leave ugly bristles stuck in your wood. Buy everything at once to save time and gas.
Preparing Your Workspace for Construction
Setting up your work area properly is highly important. You need a flat surface to assemble the pieces. A clean garage floor or a sturdy workbench works. Move any cars or fragile items out of the way. Wood dust will inevitably cover everything in the room. Have a trash can nearby for tiny wood scraps. Keep a shop vacuum handy to clean up quickly. Good lighting helps you see your pencil marks clearly. A dark workspace leads to dangerous and costly mistakes.
Woodworking is fun but safety must always come first. Always wear clear safety glasses when operating any saw. A flying wood chip can cause serious eye injuries. Wear a dust mask to protect your sensitive lungs. Pine dust is very fine and irritating to breathe. Ear protection is also smart when using loud tools. Never wear loose clothing near spinning saw blades safely. Tie back long hair before starting your power tools. Keep your fingers far away from the cutting path. Always unplug your tools when changing the sharp blades. Following these rules keeps your weekend project completely safe.
The Physical Assembly of Your Organizer
Now the real fun finally begins in your workspace. We are building space saving entryway furniture from scratch. Take your time and wear safety glasses during cuts. Precision right now guarantees a beautiful final product later. Set up your saw station in a well ventilated area. Let the tools do the hard work for you. Do not force the blade through the thick wood. Patience is the key to perfect woodworking results.
Cutting and Sanding the Pine
Mark your exact measurements lightly with a sharp pencil. Use a square tool to draw perfectly straight lines. Cut your thick frame pieces first for the outer shell. Then cut the thinner strips for the interior rests. Sanding is the next critical step in the entire process. Never skip sanding if you want a smooth professional result. Sand every board smoothly before you assemble the frame. Getting into tight corners later is extremely frustrating work. Start with medium grit and finish with fine grit. Your Custom Wooden Shoe Rack must feel silky smooth. Nobody wants dangerous wooden splinters near their expensive shoes.
Wipe away all the fine dust with a clean rag. Your boards are now ready for the final assembly. Smooth wood absorbs stain much more evenly and beautifully. Spend extra time sanding the top seating area perfectly. This is where people will touch the wood most often. You can use an orbital sander to save time. Hand sanding works perfectly fine but takes much longer. Always sand in the direction of the wood grain. Sanding across the grain leaves very ugly visible scratches.
Putting the Frame Together
Drill your hidden holes into the side frame panels. Apply a thin line of glue along the joint edges. Bring the wood together and drive your metal screws in. Wipe away any wet glue squeeze out immediately. Dried glue absolutely ruins wood finishes later on. Check the corners with a square tool very often. A crooked frame makes the whole piece look terrible. Now you must install the resting surfaces for footwear. We highly recommend building airy slatted shelves inside. Solid shelves trap dirty water and bad odors quickly. Slats let wet winter boots breathe and dry faster. Nail the slats down with even spacing between them. Your Custom Wooden Shoe Rack is now taking shape.
Ensure the bottom shelf is high enough for a vacuum. You want to clean underneath it very easily later. Use small wooden spacer blocks to align the slats. This guarantees perfect spacing without measuring every single piece. Add a middle support piece if the bench is long. Long shelves will sag under the weight of boots. A vertical center support adds massive structural integrity quickly. Your frame is now completely built and very strong. Let the wood glue dry overnight for maximum strength. Do not move the heavy furniture while glue cures.
Upgrading Your Storage Functionality
A basic box holds shoes but you want more. You can add extra features to maximize daily utility. Let us make this unit work much harder for you. Customizing the design fits your family perfectly and beautifully. Think about what items clutter your hallway the most. Add specific storage zones for those exact messy items. This turns a simple box into a genius solution. Your entryway will finally look like a magazine cover.
Adding Vertical Hanging Space
Look at the blank wall directly above your unit. This empty vertical space is a wasted storage opportunity. You can install a sturdy wooden wall mount backing. Attach it firmly into the strong studs behind drywall. Paint it to match your Custom Wooden Shoe Rack below. Then screw a row of heavy duty coat hooks on it. Now you have a place for damp winter jackets. Dog leashes and heavy backpacks finally have a permanent home. This transforms a simple rack into a home command center. Your morning routine will become so much faster now. You will never hunt for lost car keys again.
Hang a small mirror above the hooks for convenience. A quick outfit check before leaving is always nice. You can add a small floating shelf up high. This is perfect for storing winter hats and gloves. Use small decorative baskets on this top floating shelf. It keeps small seasonal items completely out of sight. A dedicated zone for everything prevents daily hallway clutter. Your guests will admire your incredible organizational skills instantly. These simple upgrades add massive value to your home.
Creating a Comfortable Seating Area
Putting on shoes while balancing on one leg is hard. You can easily modify the top of your frame. Make the top board thick enough to support sitting. Reinforce the middle section with an extra vertical support. Now your family can sit comfortably while tying laces. You can even add a custom fabric cushion later. This small change makes the space much more inviting. Guests will truly appreciate this thoughtful design detail. Add a small decorative pillow for a cozy touch.
Store your reusable grocery bags inside a small basket. Place the basket right on top of the seating area. Your entryway is now beautiful and highly functional today. You can keep an umbrella stand right next to it. Everything you need to leave the house is grouped together. This reduces morning stress for the entire busy household. A comfortable bench makes coming home a pure joy. You will love sitting there after a tiring day. It changes the entire energy of your front entrance.
Finishing and Protecting the Wood
Raw wood cannot survive the harsh reality of winter. Wet boots will destroy unprotected pine in one season. You must apply a durable protective finish right now. Do not skip this crucial step under any circumstances. A good finish keeps your wood safe from rotting. It also brings out the natural beauty of pine. A naked wood frame absorbs dirty water very quickly.
Staining and Sealing for Durability
Wipe the entire unit down with a damp rag. You must remove all residual dust before applying chemicals. Choose a beautiful stain finish to color the raw wood. Dark walnut looks very modern in most modern homes. Golden oak feels rustic and brightens up dark spaces. Brush it on evenly and wipe off the excess. Let it dry completely overnight in a ventilated room. Next you must seal the wood with clear polyurethane. Apply three very thin coats of this protective sealant. Lightly sand the surface between each wet coat application. This creates an impenetrable barrier against dirty puddle water. Your Custom Wooden Shoe Rack is now fully protected. It will survive decades of heavy daily abuse with ease.
Use a foam brush for the smoothest polyurethane application. Bubbles in the finish will ruin the smooth texture. Take your time and brush with the wood grain. Do not shake the polyurethane can before opening it. Shaking creates tiny bubbles that dry on your wood. Stir the can gently with a clean wooden stick instead. Apply the finish in a dust free room ideally. Dust falling on wet polyurethane creates a bumpy surface. Let the final coat cure for three full days. The finish needs time to harden completely before use.
Adding Protective Feet to the Base
Your floors need protection from the heavy wooden furniture. Scraping wood across a delicate floor causes bad scratches. Buy small felt pads from your local hardware store. Stick one pad under each corner of the rack. This allows you to slide the unit around safely. You can clean behind it without damaging your floors. If you have uneven floors buy adjustable leveling feet. These screw into the bottom and fix wobbling issues. A wobbly bench is annoying and potentially very dangerous.
Small details like this make your project truly professional. Your Custom Wooden Shoe Rack should feel incredibly stable always. Protect your investment with these tiny affordable additions today. You can also add small rubber bumpers inside doors. If you added cabinet doors this stops loud banging. Attention to small details makes a huge noticeable difference. You will appreciate these tiny upgrades every single day. Good furniture glides silently and sits perfectly flat everywhere.
Maintaining Your New Furniture
Building it is only the very first step. You must maintain this piece to keep it beautiful. Regular cleaning extends the lifespan of the wood finish. Dust and dirt act like sandpaper on clear coats. Protect your hard work with a simple cleaning routine. A few minutes a week keeps it looking brand new. Pine is soft and needs a little extra love.
Weekly Cleaning Best Practices
Make it a habit to wipe the wood weekly. Use a dry microfiber cloth to grab loose dust. If mud dries on the slats use a damp cloth. Never soak the wood with dripping wet sponges safely. Chemical household cleaners can slowly eat away the protective polyurethane. Plain warm water is usually all you really need. If salt stains appear in winter clean them instantly. Salt is incredibly corrosive to any wood finish over time. Place a small rubber mat nearby for the wettest boots. This keeps the worst moisture off your beautiful wood. Teach your kids to kick snow off their boots.
Simple habits preserve the wood for many long years. Your Custom Wooden Shoe Rack deserves proper daily respect. Do not throw heavy metal keys onto the wood. Pine dents easily if struck by heavy sharp objects. Use a small decorative tray to hold your keys. This protects the wood and keeps keys organized always. Wipe up spilled coffee or water drops right away. Standing water will eventually penetrate the toughest clear coats. A little care goes a incredibly long way here.
Long Term Care Tips
Inspect the joints every year for any loose screws. Wood expands and contracts with seasonal temperature changes. Sometimes this movement loosens the hardware very slightly. A quick turn with a screwdriver fixes this problem easily. You might need to reapply polyurethane after five years. High traffic areas wear down finishes faster than others. A fresh clear coat restores the original glossy shine immediately. Your Custom Wooden Shoe Rack is an investment in your home. Treat it well and it will serve you forever.
Check the wall anchors periodically to ensure structural safety. Keep heavy items evenly distributed across the slatted shelves. Do not overload one side with heavy winter boots. The wood might warp if weight is poorly distributed. Vacuum the slatted gaps to remove hidden spider webs. Sunlight can slowly fade the stain color over time. Consider drawing the blinds during the hottest afternoon hours. Your furniture will remain beautiful for generations to come. You have built a true family heirloom this weekend.
FAQ
Can I modify the dimensions of this shoe rack?
Yes you can easily change the total width or height. Customizing the size is the biggest benefit of building. Just ensure you measure your narrow hallway very carefully first. Adapting the plans guarantees a perfect fit for you.
How do I clean the slatted wooden shelves properly?
Use a damp cloth to wipe away dry dirt daily. The polyurethane seal protects the wood from gentle moisture. Never use harsh chemical cleaners on your finished wood surface. Warm water on a rag is always perfectly safe.
Do I need expensive heavy machinery for this project?
No basic handheld power tools are actually perfectly fine. A simple power drill and circular saw do the job. This project is highly accessible for beginner DIY builders everywhere. You do not need a fancy expensive workshop setup.
Should I anchor a tall wooden shoe rack safely?
Yes household safety is always the most important priority here. Use a metal bracket to secure it to wall studs. This prevents heavy loaded units from falling on small children. An anchored unit is incredibly stable and very safe.
